Hardware Description
Installation Environment
- Electrical Environment
1.When installing equipment behind the product, ensure that AC power lines, PLC output modules, contactors, starters, relays, and other types of electrical interface equipment are kept at a considerable distance from the back of this series of products;
2.Pay special attention to keeping a considerable distance from frequency converters and switching power supplies. The input and output cables of such equipment must use shielded cables, and the shielding mesh must be grounded to the system's star grounding point.
- Installation Environment
1.Do not use in places exposed to direct sunlight, wind, or rain;
2.It is prohibited to install in places susceptible to chemical pollution, acidic, corrosive, or flammable gases;
3.It is prohibited to use in places with explosion hazards, such as places with flammable gases, steam, or dust;
4.It is prohibited to install in environments with large temperature or humidity changes, which may cause condensation inside the equipment, leading to equipment damage;
5.Please avoid installing this product in environments with strong mechanical vibrations.
Installation Methods
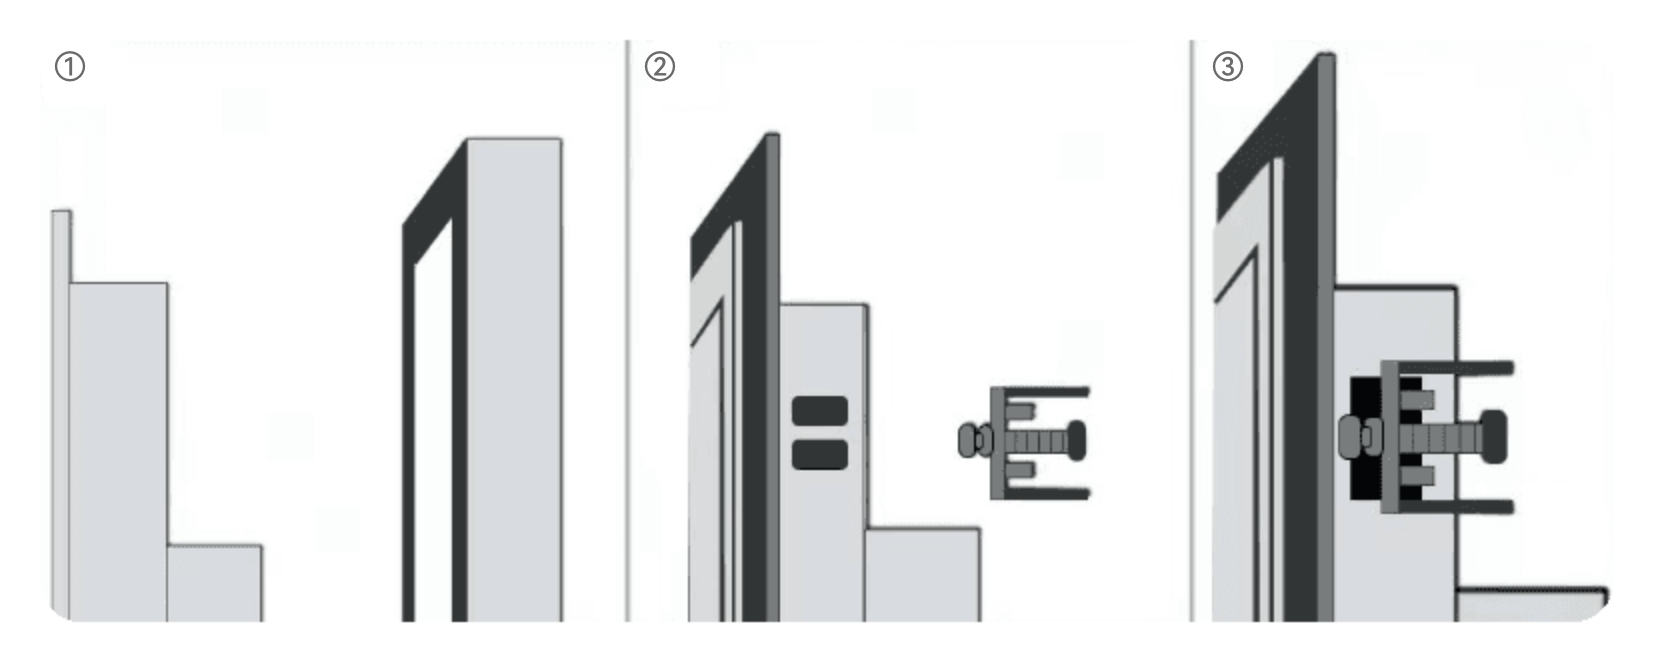
- All-in-one Machine/Touch Display Embedded Installation Method
1.Before installation, the cabinet needs to be cut. The cutout size should be slightly larger than the cutout size specified for the product;
2.Place the product into the embedded installation cutout reserved on the installation panel;
3.There are two square holes on each side of the device. During installation, use one end of the buckle to hook the square hole, and the screw head on the buckle to press against the cabinet, then tighten the screw. The installation method for the other three square holes is the same to complete the embedded installation.
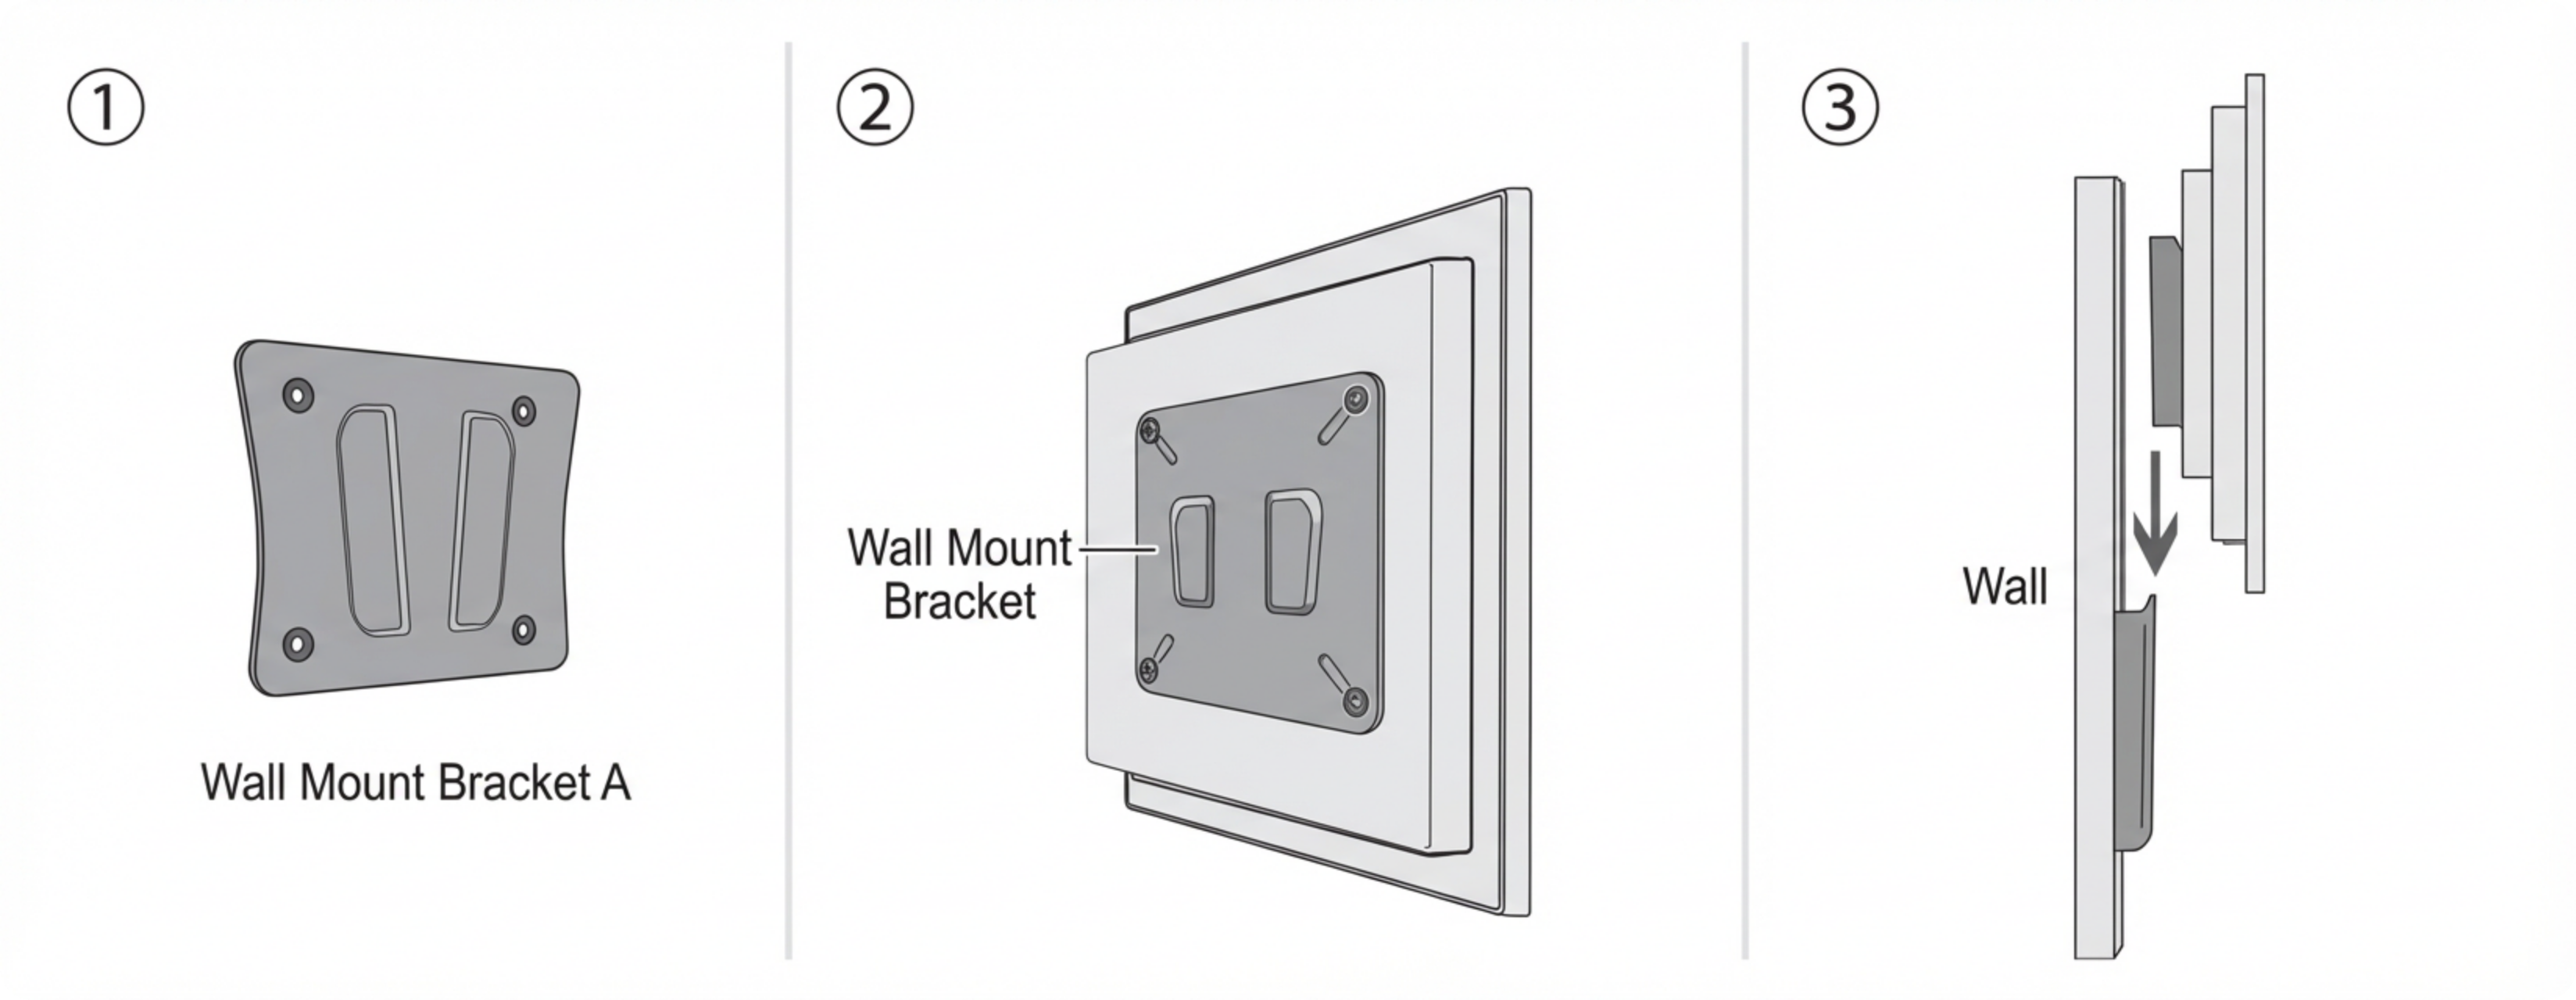
- All-in-one Machine/Touch Display Wall-mounted Installation Method
1.Fix wall bracket A to the wall with expansion screws;
2.Install wall bracket B on the back of the all-in-one machine with screws;
3.Insert the bracket on the back of the all-in-one machine into the wall bracket to complete the installation.